ADDRESS

wiseWood veneer ++ 5490 Gatewood Dr. ++ Sterling Heights, MI 48310 ++ Toll free: 855.883.6337 (855.8VENEER)
Local: 586.825.2387 ++ Fax: 586.825.2390 ++ choose@wisewoodveneer.com

September 11, 2012

Making Sense of the Myriad Mahoganies

Since the beginning of time, well maybe not that long ago, the different names for various types of Mahogany and related species have been bandied about to the point of much confusion and misinformation. We thought by providing a little information we could help to add some clarity to the conversation and also arm you (our readers) with enough facts for you to feel confident when communicating with clients and helping them make informed decisions. Here's a short course on the most common and most commonly mistaken types of Mahogany.

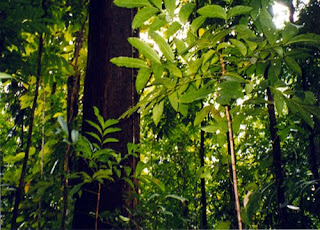
African mahogany or Khaya tree.
African Mahogany tree trunk - img courtesy of http://worldwildlife.org


African Mahogany (Khaya Ivorensis)
This is the most commonly found species being sold as Mahogany today. Its origin is tropical West Africa as the name implies. The heartwood is a medium reddish brown color and the grain structure is considered medium to coarse textured with open pores. It is moderately priced and is considered a valid substitute for Genuine or Honduran Mahogany (swietenia macrophylla).


Honduran Mahogany tree.
Honduran Mahogany tree - img
courtesy of
http://www.forestlegality.org


Honduran Mahogany (Swietenia Macrophylla)
Honduran Mahogany is what many know as Genuine Mahogany or Brazilian Mahogany. Though not as common as African Mahogany it is still relatively available commercially. Its origins extend from Southern Mexico into central South America. It is grown extensively but not exclusively on plantations and is therefore sustainable. The heartwood can vary from a pale pinkish brown color to a dark reddish brown and it will darken with age. The grain texture is considered medium with medium to large pores. It's still moderately priced and only slightly more than African Mahogany.


Cuban Mahogany
Cuban Mahogany grove - img courtesy of
http://www.bluemoonexoticwood.com 
Cuban Mahogany (Swietenia Mahogani)
Very rare and very expensive (when it's available) Cuban Mahogany is the original Genuine Mahogany. The heartwood is typically a light pinkish brown color to a dark reddish brown, usually the denser the wood the darker the color. Cuban Mahogany was extensively used in early period furniture in Europe and the US until mid century when Cuba banned all exports of the lumber because of over harvesting. It is still in scarce supply from other sources in the Caribbean. The texture of true Cuban Mahogany is medium with a medium to open pore structure.

Philippine mahogany
Philippine Mahogany Logs


Philippine Mahogany
Philippine Mahogany is an umbrella term applied to various species of wood from Southeast Asia, most often Meranti and Lauan. The woods generally referred to as Philippine Mahogany are technically not related to any wood species from the Swietenia or Khaya genus.


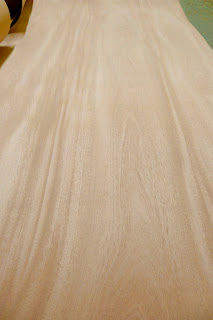
African Mahogany Veneer Special
This month we are offering Flat Cut African Mahogany 4' x 8' sheets on 10mil or 20mil paperback at substantial savings. These are first quality, A grade veneers and are mostly singles or pairs of consistent color. These are available on a first come first served basis as quantities are limited (approximately 50 sheets). Be the first kid on your block to get some quality Mahogany at unbelievable prices.


FLAT CUT AFRICAN MAHOGANY 10 MIL - $1.19/SQ.FT.
FLAT CUT AFRICAN MAHOGANY 20 MIL - $1.55/SQ.FT.


Flat Cut African Mahogany flexible veneer sheets. Plain Sliced Khaya veneer sheets.

Originally this offer was only offered to our email newsletter subscribers. But this deal is so good we figured that we could let you know about our quarterly newsletter and maybe even get you to sign up for it. When the WiseWood Wire was conceived we had many goals in mind. One of those goals was to offer something to our readers that isn't available to anyone else...an EXCLUSIVE offer (see where I'm going with this)? So sign up for the WiseWood Wire newsletter and call [(586) 825 2387] or email us [info@wisewoodveneer.com] to get the Khaya at the above prices and stock up.

You can use the following form to sign up for the WiseWood Wire.


WiseWood Veneer

August 8, 2012

Introducing the WiseWood Veneer Cabinet Refacing Kits

We would like to end our long absence from this blog with an introduction to a whole new product line from WiseWood Veneer. We now offer cabinet refacing kits. Perfect for professionals and do it yourselfers. We have taken care to include everything that you would need to reface kitchen cabinets, bathroom vanities, or other types of furniture. Unless the remodel project calls for a change in size or a reconfiguration of the cabinet layout, the cabinets are (in most cases) just fine and do not need replacing. A change in appearance is what most people are after and this is where a cabinet refacing kit comes in handy.


The kits come in 3 different sizes and are an economical way to give your cabinets a face lift and a new look. Re-facing is a lower cost alternative to a complete tear out and reinstallation of new cabinets. Also it can be done in a fraction of the time at fraction of the cost. Available in the most popular species such as cherry, maple, mahogany and walnut, the kits come with veneer and edgebanding of your choice, a veneer scraper, a utility knife, a tack cloth, sandpaper and a sanding block. Detailed and comprehensive step by step instructions are also included.


Each veneer sheet is backed with 3M™ pressure sensitive adhesive which simplifies the application process. The edgebanding is pre glued with a hot melt adhesive which is easily applied with a household iron. Both, the veneer and edgebanding will accept stains and finishes so you can customize and match colors to give your cabinets the exact look you want. With 3 different sized kits you can get the appropriate kit for the size of your project. However, if you run short on veneer or edgebanding you can always buy 2’ x 8’ PSA (pressure sensitive adhesive) backed veneer sheets individually and edge banding in small 50’ rolls separately.


Below is an excerpt of the cabinet refacing instructions but you can also download them in a PDF file. We would love to hear from you if you happen to have any questions or comments whether by phone [(586) 825 2387] or by email [info@wisewoodveneer.com]. We are always here to help if you happen to run into trouble.


Cabinet Refacing Instructions

For Face Frame Cabinets

For the purpose of describing only the cabinet refacing process we have left out any reference to replacement of doors and drawer fronts. Although this is also a major part of any refacing project the options are numerous and can be better dealt with by those companies that sell replacement doors and fronts.


Prepare Cabinets Boxes For Refacing (excerpt)

• Remove doors and hinges. If planning to re-use any hardware keep hinges and screws together in a safe place.

• Remove any trim molding by using a stiff putty knife or small tack puller under the edge of the molding and gently pry loose.

• Remove complete drawer boxes and set aside in a safe area.

• Now you’re down to cabinet boxes only. Inspect frames for any loose or peeling surfaces and repair these as well as any deep dents or scratches. These can be filled with wood putty or even better, auto body filler (Bondo) and sanded smooth.

• Lightly hand sand all surfaces with 120 grit sandpaper and a sanding block. You just want to “scuff” the surface, not completely remove the finish down to bare wood. Don’t use a power sander for this purpose.

• Wipe down all surfaces with a mild detergent and water solution or a mild solvent like denatured alcohol. Use a damp cloth only so as not to soak or saturate the wood and allow ample drying time. After surfaces are completely dry wipe with a tack cloth to remove any remaining dust or particles.


Veneering End Panels

• Your kit comes with 2 different types of veneer, sheet veneer with a PSA (pressure sensitive adhesive) backing and rolled edge banding with a hot melt adhesive backing.

• You will start veneering cabinets by first applying PSA veneer to any exposed end panels. The wood edge banding will be used on the inside edges of the face frames around door and drawer openings.

• For the end panels take careful measurements for height and width. Cut the veneer width to the exact size and cut the height about an inch oversized using a good square and straight edge. Usually the face frames on cabinets extend an 1/8” or so beyond the cabinet end panel so you’ll be fitting this veneer between the backside of the face frame and the wall. By leaving the tall dimension of the veneer extra long you’ll have some free play when trying to align and place this end piece. After the veneer has been cut to fit this panel you will want to dry fit it before removing the release paper and exposing the PSA glue surface. The face frame overlap gives you a good edge to register the veneer against. When you’re satisfied with the fit you are ready to move on to the next step and apply the veneer.

• Peel away a few inches of release paper on the front edge to expose the adhesive. Register the veneer to the top or bottom of the end panel and butt up tight to back of the face frame. With the veneer placed where you want it, apply light pressure by hand to the surface along the leading edge where you’ve exposed the glue surface to effectively anchor the piece and prevent movement. Now you can reach behind with one hand to pull back the release paper while smoothing the veneer surface with the other hand as you go. With the veneer firmly affixed, smooth with the veneer scraper while applying downward pressure, moving in the same direction as the grain.

• Inspect the surface for any bubbles or loose edges. If any of these conditions exist go back over these areas with the veneer scraper.

• Repeat this process on any exposed cabinet ends. Instructions continued here.


PDF version of these instructions

WiseWood Veneer

April 3, 2012

How To Use Iron On Edgebanding

Wood edgebanding is a great way to put the final touches on your veneer project. It is easy to use, covers the edges of your substrate and gives your project uniformity and the appearance of solid material. It is available in virtually every wood species and almost any size. Whether your project is made with exotic or domestic veneer species we can offer you a Pre Glued or Iron On edgebanding to match. Edgebanding can also offer other aesthetic and creative opportunities for your furniture or kitchen designs that might not be practical with solid wood material. Some designers like to use contrasting color and/ or wood species edgebanding on the edges of doors and drawers to create bold and dramatic lines in their designs.

Iron On edgebanding is very simple to use whether you have an edgebander for production runs or you are just using a household iron to apply it. Below you will find our comprehensive instruction for using Pre Glued edgebanding. And through the month of April we are offering a 10% discount on all our in stock Pre Glued and Fleeceback edgebanding.


Iron on Edge Banding Application


Tools and Supplies
Working with iron on edge banding isn’t hard and doesn’t require any specialized tools or skills. Most of the tools you will need can be found in almost any home. You will want a standard household iron, an edge trimmer or standard utility knife or razor knife. We suggest you dedicate an iron for this purpose only as you may get some glue “squeeze out” when applying the edgeband. A small travel size iron offers better control than a standard iron.


Getting Started
Whether the edges to be covered are MDF, plywood or particle board, be sure that any deep saw marks are smoothed and any voids filled. Your iron should be set on a medium heat setting. A high setting is not necessary because the hot melt adhesive on the edge banding has a low melting point. The possibility of scorching the surface of the edge banding is also significantly reduced at this lower setting. Cut your edge banding about ½” longer than the edge to be banded. Also note that rolled edge banding has finger joints, or splice joints, typically every 4’-6’. A little pre-planning will help you to work around these joints if they are too noticeable or happen to be in a high visibility area. Starting at one end, position the edgeband with one hand and apply heat and downward pressure with the iron. We recommend doing 4” to 6” first and allow it to cool which will take approximately a minute. Now that the adhesive has cooled you have effectively “anchored” the strip which will make it easier to apply the remainder of the strip. Now you can move the iron steadily along the length of the edge while applying downward pressure with the iron. Normally you will exert enough pressure with the iron but you should check to make sure all the surface area is firmly sealed down. If you discover loose spots or edges that may want to curl up then you can re-heat the area and immediately apply pressure with a wood block, veneer scraper or flat edge tool to ensure a proper bond. Always apply the edgeband on the most visible surfaces last. By applying the most visible surfaces last you will ensure that any adjoining edges that butt up to this edge will be covered or over-lapped and therefore will be less visible.


Trimming the Edge Banding
Edge banding can be trimmed with a sharp utility or razor knife, a sharp wood chisel or a commercially available flush trimming tool. Good results can be achieved with any of these methods. To trim the excess length from a strip of wood edge banding simply cut with a utility knife or razor knife back to the panel end. Cutting across the wood grain like this is best accomplished using 2 or 3 scoring cuts instead of cutting through with one heavy stroke. This will help avoid any grain tear out, especially with coarse grained woods like red oak, hickory, white ash and some others. For trimming the excess from the edges use a sharp knife edge or sharp chisel held at a slight angle, not perpendicular, to avoid gouging or scarring the adjoining surface. For best control use short strokes with your knife or chisel blade. Don’t be concerned if you leave a little excess as this will be taken care of in the final step. If you are using a flush trimming tool press the edge of the tool firmly against the face of your panel and slide it along the edge to trim the excess edge banding. Working with the grain direction instead of against the grain will produce a cleaner cut with minimal grain tear out.


Finishing Up
To give your project that finishing touch use a sanding block with 120 grit abrasive. Sand any excess edge banding with this block skewed at an angle to produce a slight beveled edge. Run your fingers along this edge to check for any sharp edges or loose grain that could snag and tear out. Allow 24 hours before staining or finishing.


PDF version of these instructions

WiseWood Veneer

March 13, 2012

Product Feature: Long Sequence Quarter Cut High Figure Anigre Veneer.

High Figured Quarter Cut Anigre


4’ x 8’ FlexVen™10 (10 mil) paper backed veneer

$5.49 per sq. ft. on 1 – 9 sheets
$5.29 per sq. ft. on 10 or more sheets

34 sheets available – long sequence

This quarter cut high figure anigre veneer has a consistent prominent figure, a clean uniform grain, and color. Compare this excellent veneer to other suppliers’ architectural grade. This set of veneer sheets is from one log and is of long sequence. It is perfect for large projects such as kitchens, bookcases, other large furniture, or custom furniture sets. Available for a limited time at a price that can’t be beat.


For further details or a quote please contact us.
email: info@wisewoodveneer.com
call: 586.825.2387


WiseWood Veneer

March 9, 2012

March Veneer Specials

Throughout March or while supplies last, WiseWood Veneer is running a couple of specials on two of our most popular veneer species.

First up is flat cut African Mahogany veneer, also know as plain sliced Khaya. This species continues to be a staple among woodworkers and cabinet makers. A pinkish-red brown to a deep darker red brown color, flat cut African mahogany veneer has well defined cathedrals and lustrous grain. Khaya is an African hardwood of medium density that is often used as a substitute for South American mahogany. It is easy to work with and strong, with a moderately coarse texture, slightly porous grain and consistent color. Flat cut African mahogany veneer will accept stains and finishes well which accentuate the grain’s natural luster. For a limited time pay only $44.48 per 4' x 8' 10 mil paper backed sheet. Some sequencing is available. Give us a call at 586.825.2387 or email us at info@wisewoodveneer.com.


Next up is flat cut Teak veneer. A very common species among boat builders, plain sliced Burma Teak veneer is also used for by fine furniture builders. This teak is usually a golden honey brown to a deep brown color that darkens with age. Often praised for being weather and moisture resistant, it is a dense and oily hardwood that is relatively easy to work with and strong. Teak is heavy with a uniform coarse texture and medium porous grain. Teak veneer is usually not stained but finishes well with a clear coat, especially a wipe on oil finish, which preserves the warmth and accentuates the color and beauty of the wood’s natural grain. These 4' x 10' 10 mil paper backed sheets are available for only $103.60 per sheet. Give us a call at 586.825.2387 or email us at info@wisewoodveneer.com.


WiseWood Veneer

January 20, 2012

The Things Some Of Our Customers Do With WiseWood’s Veneer.

2011 has been a very busy year for WiseWood Veneer. As we expand our services and our stock, we thought we would take this opportunity to share some of the highlights from the past year. Here are several examples of custom veneer products that we have been able to do for our customers and some examples of what our customers have been doing with our veneer. What better way to preview the forthcoming customer feature, gallery and testimonial pages that we will be adding soon to our website.

A few highlights of our custom veneer jobs included 12 foot long Macassar Ebony and Wenge, oversized medium figure Anigre panels, and 3 foot wide highly figured Curly Maple and heavy Birdseye Maple.

macassar ebony


One of our customers in Arizona had a call for 12 foot long quarter cut Macassar Ebony and quarter cut Wenge for a 12 foot custom dining room table. We were able to provide them with 4 sequenced custom 20 mil paperbacked Ebony sheets. The two paired sets were balanced matched and measured at 24” by 145” and 32” by 145”. The oversized 4’ x 12’ quarter cut Wenge was a matched pair also on a 20 mil paper backer. We are looking forward to seeing pictures of the finished product.

12' quartered wenge12 ' quartered macassar ebony


medium figure anigre


Speaking of large tables, recently we supplied a customer in Ohio with 5 oversized medium figured Anigre panels for a large conference table. The panels measuring at 55” x 97” were sequenced and balanced matched with premium Anigre faces laid up on 1” thick core. Each panel was balanced with a B grade Maple to further insure stability. We hope to get pictures of the finished table soon.

highly figured curly maple veneer


We also had a customer who needed 36” x 102” highly figured Curly Maple and heavily figured Birdseye Maple on white 10 mil paper. We book matched and sequenced both premium veneers for a really great looking sheet. As it happens, we ended up making too many for the customer and now we are offering these as a featured overstock item. There is more info about the Curly Maple here.


Not all our customers need custom veneer to complete their projects. Several of the more notable customer’s projects used our regularly stocked veneer, including a lightly figured Cherry, reconstituted Wenge and quartered Padauk.


figured cherry speakers


This set of speakers was built by a customer using a light figured Cherry veneer with a 3M PSA backer. It is easy to see how a good finish will accentuate even a light figure.


reconstituted quartered wenge


The sleek coffee table in this photo was built by a customer using our reconstituted Wenge veneer. Its clean and elegant design is emphasized by the consistent grain and color common in composite veneers.


quarter cut padauk veneer lights


The most creative use of our veneer goes to this customer and their designer. They used a 10 mil quarter cut Padauk to fabricate a series of circular light fixtures. The simple, contemporary design and the naturally deep color of Padauk add style and warmth to the room.


In the next few weeks we will be finishing up web pages that will showcase our customers, their projects and skills. If you would be interested in us showcasing your projects using our veneer please contact us via email at info@wisewoodveneer.com.


WiseWood Veneer